Learn how to set up a Windows Event Collector and let your servers or clients send events to it with this Windows event collector tutorial.
Checking the events for one system is pretty easy. But checking events on just a few servers is not much fun. Fortunately Microsoft added a feature called Windows Event Collector, which allows us to centrally collect events from multiple servers and clients.
Table of Contents
Preparation
This tutorial will show you how to set up a collector server and how to let your servers send certain events.
I assume that the collector server is already installed and patched completely. The requirements are not different to any other server. Of course the logs will take up disk space, so ensure that sufficient space is available.
For the installation, you will need console or remote desktop access to the collector server and either console/remote desktop or PowerShell remoting access to a source server (I will use the term “source server” through this tutorial, but clients will work as well).
If you want to configure multiple server, I will show you how to configure them with group policies. A basic understanding of group policies is therefore required.
Collector server
Enable PS Remoting
Event collection with source computer initiated subscription (which we are going to use) requires PSRemoting to be enabled.
Run this powershell to enabled it:
Enable-PSRemoting
Start the collector service
The first step is to start the collector service. The easiest way is to access the Event Viewer on the collector server and click on Subscriptions. This will trigger the server to ask if you want to start the service:
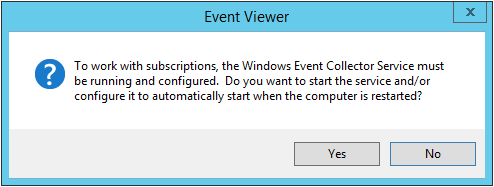
Start collector service
Alternatively, you can use PowerShell to start the service:
Start-Service WecsvcChange permissions for Server 2016 and 2019
In earlier Windows server versions, the Windows event collector and Windows remote management use the same process. With Server 2016 and 2019 this behavior can be changed or changes automatically (When using more than 3.GB RAM on Server 2019) so that they are using different processes.
Therefore you have to adjust the permissions for the http endpoint.
Click here for more information from Microsoft.
Open an elevated prompt or PowerShell prompt and enter:
netsh http delete urlacl url=http://+:5985/wsman/
 netsh http add urlacl url=http://+:5985/wsman/ sddl=D:(A;;GX;;;S-1-5-80-569256582-2953403351-2909559716-1301513147-412116970)(A;;GX;;;S-1-5-80-4059739203-877974739-1245631912-527174227-2996563517)
 netsh http delete urlacl url=https://+:5986/wsman/
 netsh http add urlacl url=https://+:5986/wsman/ sddl=D:(A;;GX;;;S-1-5-80-569256582-2953403351-2909559716-1301513147-412116970)(A;;GX;;;S-1-5-80-4059739203-877974739-1245631912-527174227-2996563517)
Create subscription
The next step is to create a subscription. A subscription defines which source servers will send which events to the collector.
Open the Event Viewer, right click on Subscriptions and select Create Subscriptions…
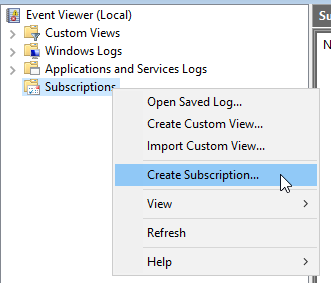
Create subscription
The subscription we are going to build will collect events indicating the usage of SMB version 1. So the subscription name is SMBv1 usage.
You can add a description, but this is not required.
The destination log specifies where the collected events will be stored in. Forwarded Events is the default value and this is what we are going with. If you are collecting multiple subscriptions, you can later define views to list your logs separately.
The subscription type defines which party initiates the communication. We will use Source computer initiated. I prefer this over collector initiated subscription as it does not require us to open inbound ports on the source server as the communication is triggered from the source servers. Plus we don’t have to handled user name and passwords or managed service accounts.
Click on Select Computer Groups… to add computers from which we want to receive events.
Add computer groups
The dialog title is computer groups, but you can add single computers too. Click Add Domain Computers… to select your servers, clients or group(s) and then OK to close this dialog.
Now you have to select which events are to be collected. Click on Select Events…
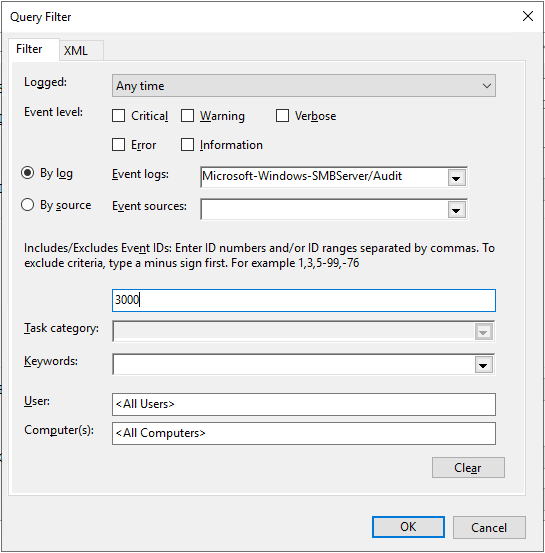
Select events
Here you can select from a large range of filters to get only the needed events. After defining your filters, click OK to close the dialog.
For advanced settings, click Advanced….
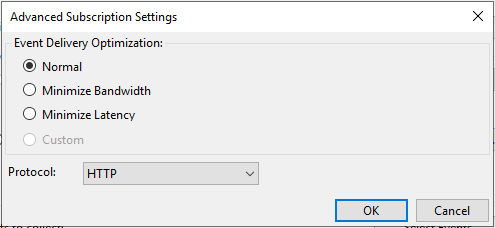
Advanced settings
This dialog allows you to tweak how the delivery of events is optimized. If you have requirements for bandwidth or latency (e.g. because you send events over WAN), choose one of the options.
For this tutorial I will use HTTP as the protocol. If you are using certificates already, change the protocol. Keep in mind that you have to change the URL for the subscription later.
Click OK to close the advanced settings and again OK to create your subscription.
Subscription added
Source server
Set target subscription manager
The first setting is which collector(s) the computer has to contact. As we are using source computer initiated subscriptions, the source computer has to contact the collector and therefore we have to tell him the URL of the collection service.
The easiest way is to the create a group policy.
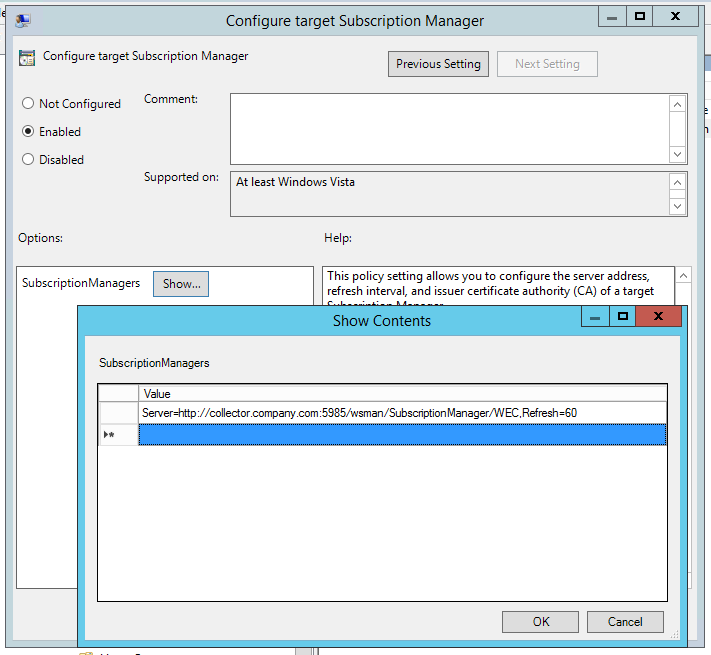
The path is Computer Configuration > Policies > Administrative Templates > Windows Components > Event Forwarding > Configure target subscription manager
Enable the policy and add the entry
Server=http://FQDNofTheCollector:5985/wsman/SubscriptionManager/WEC,Refresh=60
If you want to use a different interval, change the refresh value accordingly or delete everything after the comma.
Have you set your collector to use HTTPS, change the protocol and use the port 5986 instead of 5985.
Define subscription manager
Alternatively you can use an elevated PowerShell prompt to add the required registry value:
New-ItemProperty -Path "HKLM:\Software\Policies\Microsoft\Windows\EventLog\EventForwarding\SubscriptionManager" -Name "1" -Value "Server=http://FQDNofTheCollector:5985/wsman/SubscriptionManager/WEC,Refresh=60" -PropertyType REG_SZ -Force
With the subscription manager set, your source system fetches events to send from the collector.
Allow NT AUTHORITY\NETWORK SERVICE to read event logs
The event log service is executed as network service. This service by default does not have permission to read event logs. You have to add the account to the Event Log Readers group.
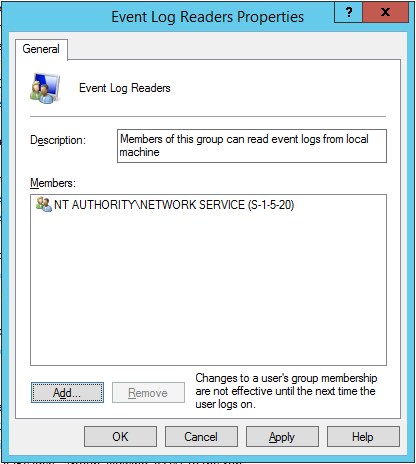
Add network service to Event Log Readers group
Add permissions for applications and services logs
The NT AUTHORITY\NETWORK SERVICE is now in the Event Log Readers group. This allows it to read the Windows logs “Application” und “System”.
If you want to forward events from other logs, you need to give the network service permissions for the logs.
To add permissions to logs, you need to know the internal name of that log. Open the event viewer and browse for you log. Right click on it and select Properties.
Copy the entry Full Name.
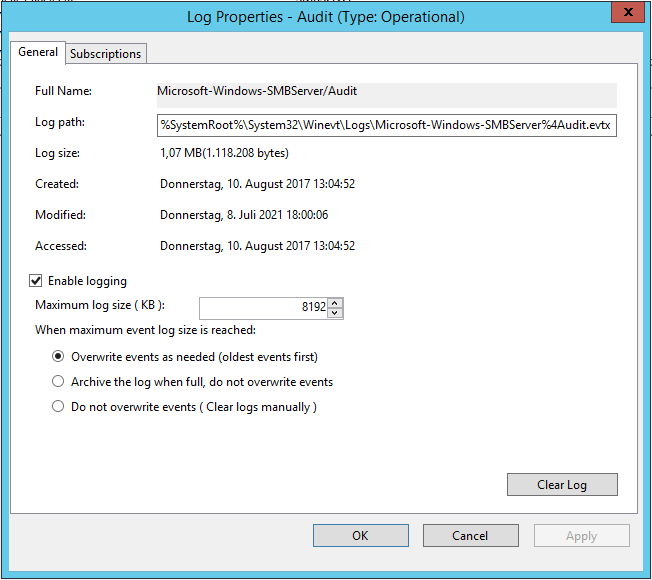
Event log properties
The permissions can be added either by command line:
wevtutil set-log EventLogFullName /ca:O:BAG:SYD:(A;;0x5;;;BA)(A;;0x1;;;S-1-5-32-573)
For our example log, the command would be:
wevtutil set-log Microsoft-Windows-SMBServer/Audit /ca:O:BAG:SYD:(A;;0x5;;;BA)(A;;0x1;;;S-1-5-32-573)
This command gives the local administrators full access and the network service (SID: S-1-5-32-573) read permissions.
Alternatively you can add the permission via a registry key. This also allows you to distribute the permissions with group policies.

Event log permissions distributed via group policies
The key is:
Key: HKEY_LOCAL_MACHINE\SOFTWARE\Microsoft\Windows\CurrentVersion\WINEVT\Channels\EventLogFullName
 Value name: ChannelAccess
 Value type: REG_SZ
 Value: O:BAG:SYD:(A;;0x5;;;BA)(A;;0x1;;;S-1-5-32-573)
Restart the event log service after changing the registry.
Verify collection
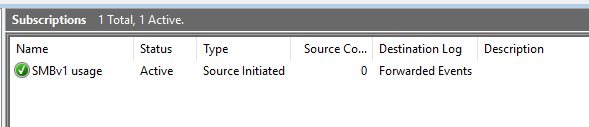
At this point, your source servers should send you their events to the collector and the collector should list the events in “Forwarded events”.
To validate that all your source systems are forwarding, you can either check the source computer count in the event viewer. Open the Subscription folder and check the value in the column Source Computers.

Source computers count
If you like to have to have more information about your source server, open a command prompt and enter this command:
wecutil gr SubscriptionName
This will list all sources, their current status and the last time they contacted the collector.
Check source computer
Conclussion
Setting up an event collector is pretty easy. The only nasty thing is the permissions for the network service. If you set up your collector and added it to all your servers or clients, you have an easy-to-administrate infrastructure as any new log or event, you want to collect, just has to be added in the collector.
Top!
Thanks a lot for sharing.
I get this message for all events that are forwarded to the collector server.
The description for Event ID cannot be found. Either the component that raises this event is not installed on your local computer or the installation is corrupted. You can install or repair the component on the local computer.
Both event source servers and the collector server are on 2019 version.
Any idea what is wrong ?
netsh http add urlacl url=http://+:5985/wsman/ sddl=D:(A;;GX;;;S-1-5-80-569256582-2953403351-2909559716-1301513147-412116970)(A;;GX;;;S-1-5-80-4059739203-877974739-1245631912-527174227-2996563517)
that command throw back an error and I cant figure out what is wrong
Did you run the command in CommandPrompt or Powershell? I got an error when I tried in Powershell but it worked ok in CommandLine.
Hi. For monthly Windows patching, is there a set procedure to stop/start the Subscription service?