Welcome to my tutorial for the Windows Server Update Services Part 3: Installation
The installation follows the same steps for GUI and core servers. But as the execution is different, I will separate both. The core installation follows my previous article (https://andys-tech.blog/2019/05/wsus-on-server-2019-core/). This guide assumes that you have already installed a Windows server operating system on a device or virtual machine following the planning and prerequisites guide.
These are the steps for the installation:
- Preparing disk, volumes and drive
- Installing WSUS
Important: This guide is provided as is and does not guarantee to be without errors or mistake. Use a test environment and create all necessary backups before proceeding.
Table of Contents
Installation on a GUI server
For this tutorial, I will assume that you have 2 disk on your server (C: for the operating system, d: for your WSUS files and R: as DVD drive)
This tutorial has been created on a Windows Server 2019. Some screens might be slightly different on another version.
Preparing disk, volumes and drive
Open the disk management (Start > Run > diskmgmt.msc or Windows-Key+X and Disk Management).
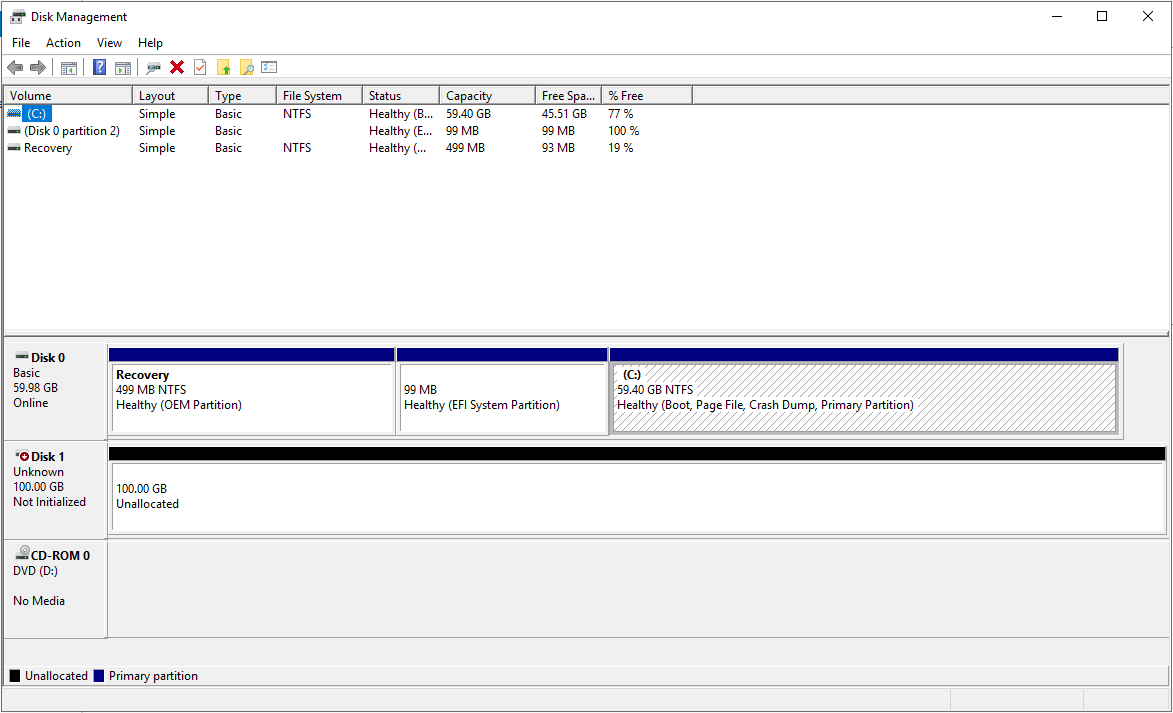
Disk management
Your console should like something like this:
The first step is to change the drive letter of your DVD drive. Right click on CD-ROM 0 and select Change Drive Letter and Paths….
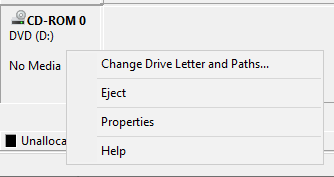
Change drive letter
A new dialog appears. Click on the drive letter D and click Change…. Select the letter R for the drive and confirm OK twice.
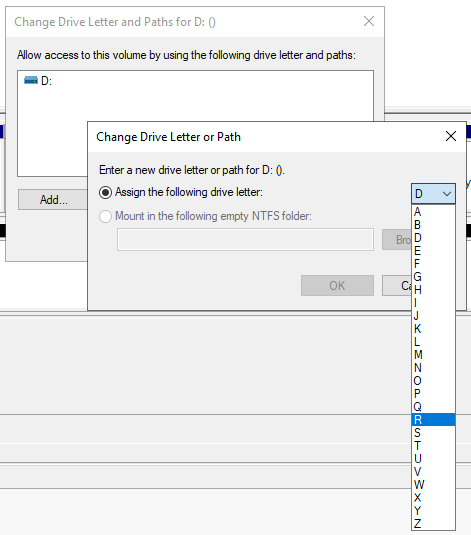
Select drive letter
Now you have to setup the second disk. Right click on Disk 1 and select Initialize Disk (Your drive might be offline. In that case, select Online first).
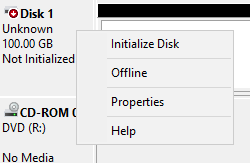
Select initialize disk
In the dialog now appearing, select “Disk 1” and GPT (If you company does not have a policy against it). Click OK.

Initialize disk
The initialized disk does not have a volume yet. Right click the uninitialized volume and select New Simple Volume…. Follow the wizard by clicking next (Select the entire disk for the volume, choose drive D as letter and format it with NFTS as file system. I personally label the drive WSUS to make its purpose clear).
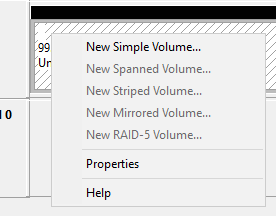
New volume
The new volume should show as health with the correct settings.
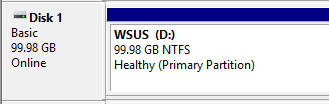
Disk ready
The last step is to create a new folder WSUS in the root of drive D as WSUS does not work on root folders.
Installing WSUS
To install the WSUS role, open the Server Manager. After it has gathered all information about your server, click manage and select Add Roles and Features.

Add roles and features
Click through the wizard until you have to select the server roles. Select Windows Server Update Services.
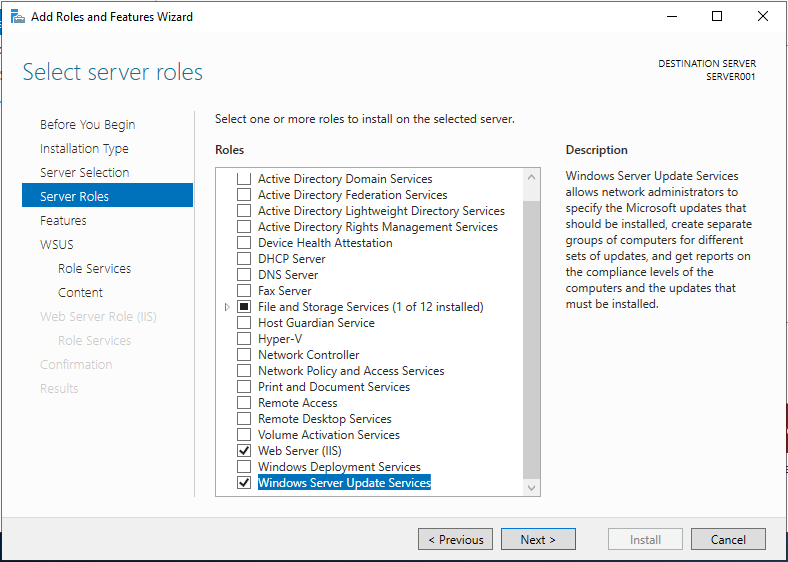
Select WSUS role
Another dialog will show you which roles have to be installed additionally. Make sure that Include management tools is checked and then click Add Features.
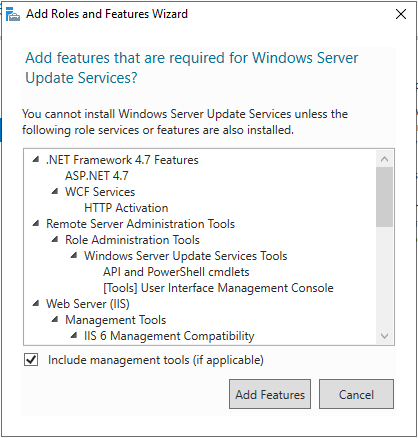
Additional features
Click next to select the features to install. With the selection of the WSUS role some of the features have been pre-selected. Leave them as they are. If you want to use a MS SQL server, de-select the Windows Internal Database feature and confirm the dialog with Remove Features.
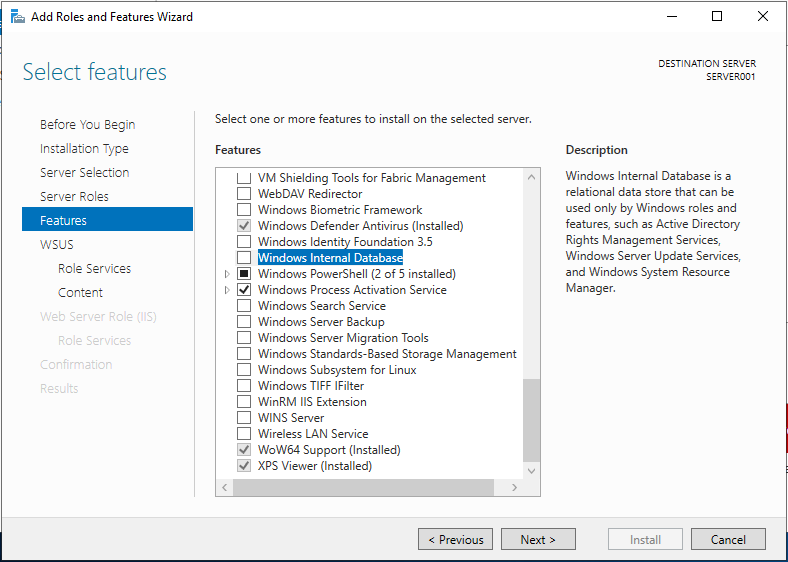
Add features
Click next for some WSUS specific settings. Read the information and then click next.
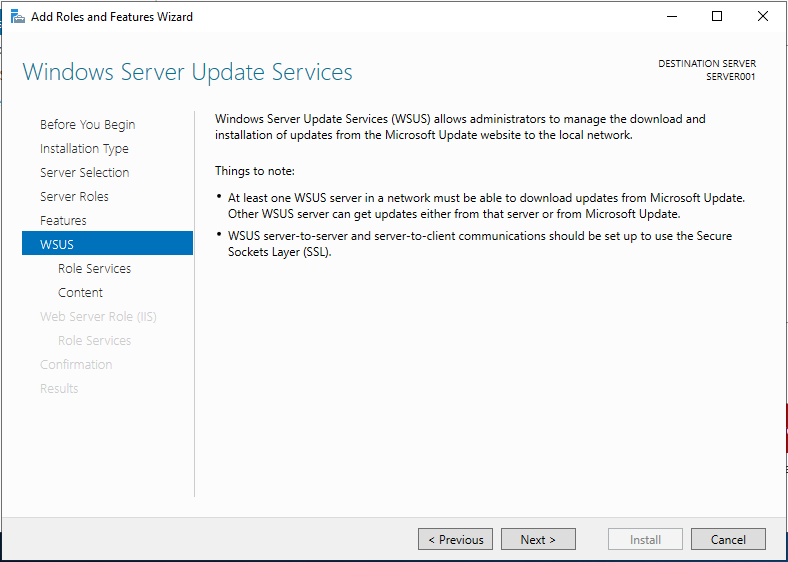
WSUS introduction
In this step you have to select the role services you need. The WSUS Services role is mandatory and should already be checked. Select WID connectivity if you want to use the Windows internal database or SQL Server Connectivity if you are using a MS SQL server.
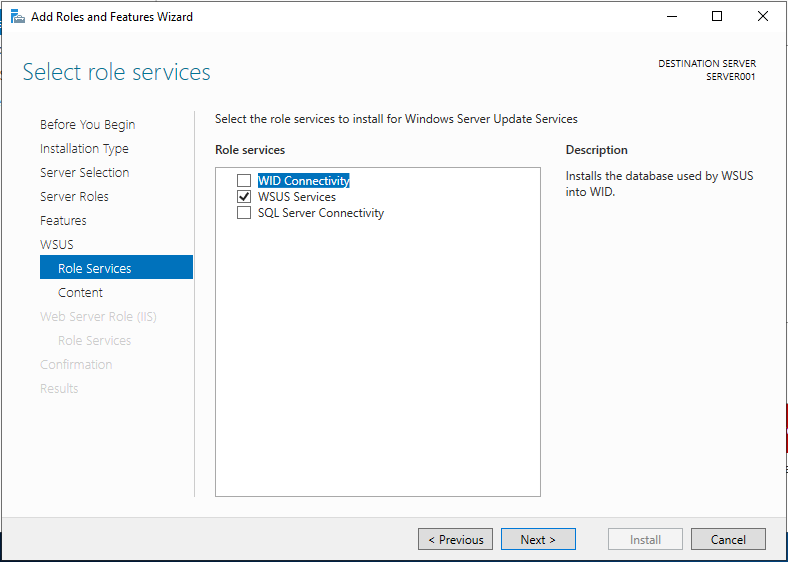
Select DB connectivity
Click next.
The next page asks for the path where your WSUS will store the update files. Enter d:\wsus or the path you are planning to use. Click next.

Content path
If you have selected to use a MS SQL (express) server instance, then the database instance selection comes here. Enter your server and instance name in the form MySQLServer\InstanceName and click check connection. If no error message showed up, click next.
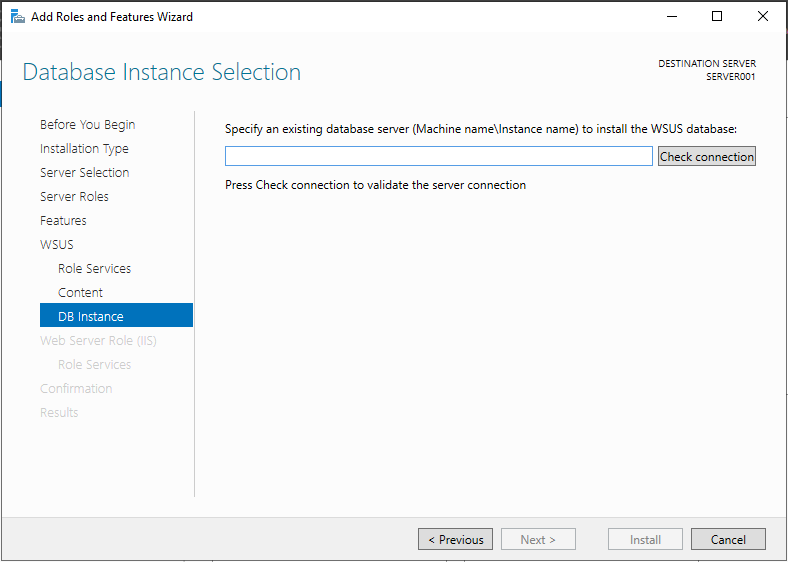
Define database instance
Read the IIS introduction and then click next.
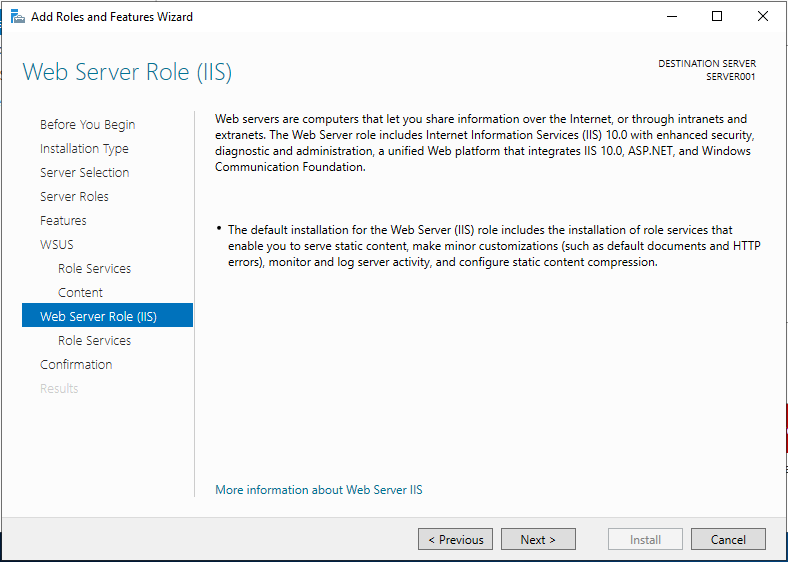
IIS introduction
The IIS roles are pre-selected and can be confirmed without changes. Click next.
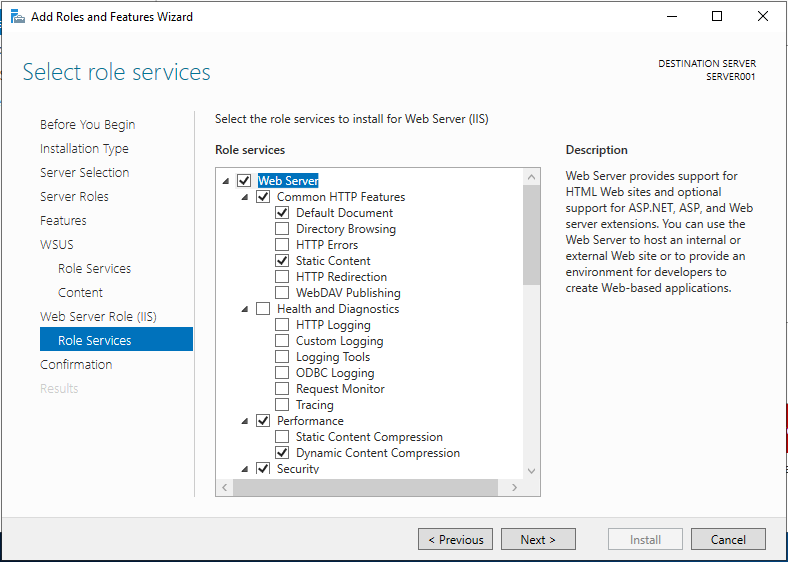
Select IIS roles
The next page lists all roles and features to be installed. Re-check them and click Install.
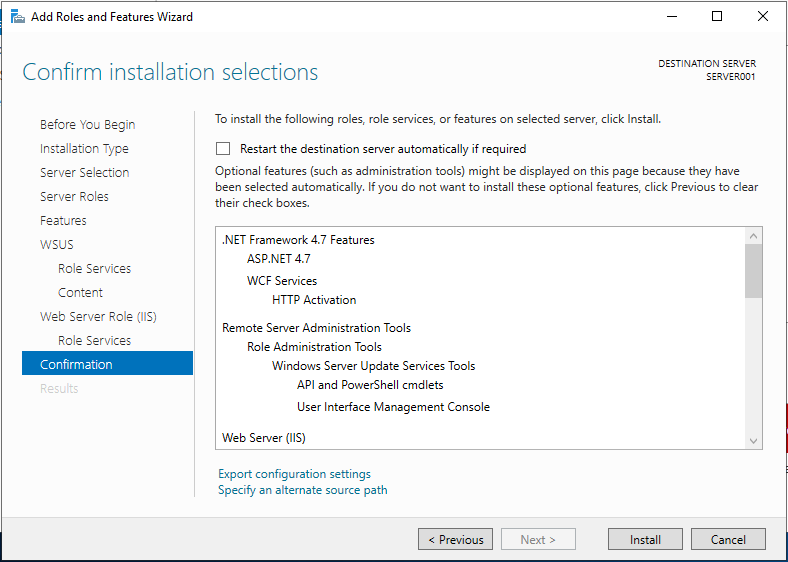
Confirm changes
Now the wizard will run the installation. Wait for it to complete.
After the installation has been completed, you will see an exclamation mark next to the flag symbol indicating that additional steps are required (In this case the post-installation tasks).
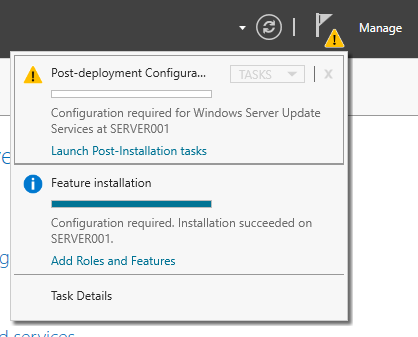
Post installation tasks required
But first, install updates and restart your server as the post-install task might fail if you don’t. After the restart, click on Launch Post-Installation tasks and wait for them to complete.

Launch post installation tasks
Installation on a core server
Preparing disk, volumes and drives
Logon to your server and open a Powershell prompt (Via console, remote shell or remote desktop).
If your drives are all setup completely including initialization, formatting and drive letters, then you can skip this chapter.
The first thing you might want to change is the letter of your CD/DVD drive. Many tutorials set the WSUS hard disk on drive letter D, but that’s where the CD/DVD is often assigned to.
To change this, you are using the following command to change the drive letter from D to R:
Get-WmiObject -Class Win32_volume -Filter "DriveLetter = 'd:'" |Set-WmiInstance -Arguments @{DriveLetter='R:'}Next you have to initialize the second hard disk for the update files. Enter
Get-Disk
to get a list of hard disks.
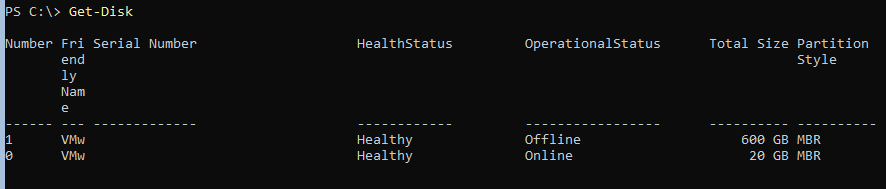
Check the column operational status. If one disk is shown as offline, remember the disk id and switch it to online (Change the 1 after number to your disk number):
Set-Disk -Number 1 -IsOffline $false
Now that disk has to be initialized. Use the same disk number for this command.
Initialize-Disk -Number 1
This initializes the disk using GPT partition style. If you want to use MBR add the parameter -PartitionStyle MBR to the command.
Next step is the creation of a partition.
New-Partition -DiskNumber 1 -Size 90GB -AssignDriveLetter
This creates a 90GB partition and assigns it a drive letter. If the partition should use the entire disk, replace the -Size parameter with -UseMaximumSize:
New-Partition -DiskNumber 1 -UseMaximumSize -AssignDriveLetter

Remember the drive letter of that drive. If you want to use a different letter:
Set-Partition –DriveLetter F -NewDriveLetter D
Now format the newly created drive.
Format-Volume -DriveLetter D -FileSystem NTFS -NewFileSystemLabel WSUS
The file system has to be NTFS (WSUS does not support ReFS) and I prefer the drive to be labeled WSUS, but you can name it whatever you want.
Now create a subfolder WSUS on the new drive as WSUS does not like its content folder to be placed in root.
New-Item -Path D: -Name WSUS -ItemType Directory
Install WSUS
Now, that the server is prepared for the WSUS role, let’s start with the installation.
If you would like to see all WSUS related features, use the Get-WindowsFeauter cmdlet:
Get-WindowsFeature –Name UpdateServices*
Important: The next command is different, depending on if you want to use the Windows Internal Database (WID) or an SQL server instance.
WID:
Install-WindowsFeature -Name UpdateServices-Services -IncludeManagementTools
With SQL server instance:
Install-WindowsFeature -Name UpdateServices-Services,UpdateServices-DB -IncludeManagementTools

If you have used the wrong command, uninstall the features with
Uninstall-WindowsFeature -Name names-from-the-command-used
and then enter the correct command again.
This will install the necessary files and services for your WSUS.
The last step is to tell your server, which SQL instance to use (If you are not using WID) and where to store the update files. Change to the tools folder in the WSUS application directory:
cd 'C:\Program Files\Update Services\tools'
You are going to use the program WSUSutil.exe, which offers many configuration possibilities for your WSUS. The parameter you are using is postinstall. It requires additional parameters depending on your environment.
Important: The next command is different, depending on if you want to use the Windows Internal Database (WID) or an SQL server instance.
WID:
.\WsusUtil.exe postinstall CONTENT_DIR=D:\WSUS
Change the directory if you are using a different path.
MS SQL server:
.\WsusUtil.exe postinstall SQL_INSTANCE_NAME="SQLServer\Instance" CONTENT_DIR=D:\WSUS
Change the SQL server name and instance and the path, if you are using a different folder.

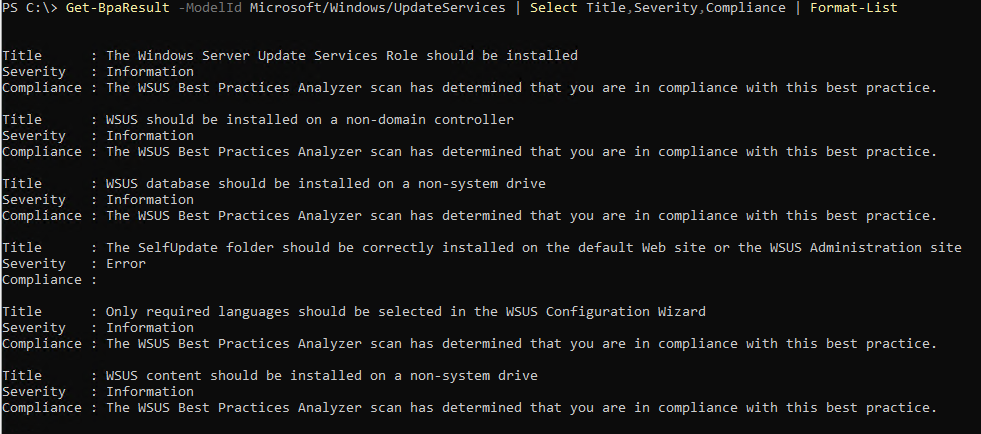
An optional step is to analyze your WSUS installation using the best practice analyzer:
Invoke-BpaModel -ModelId Microsoft/Windows/UpdateServices
Get-BpaResult -ModelId Microsoft/Windows/UpdateServices | Select Title,Severity,Compliance | Format-List
This gives you some hints on how to optimize your system.
And that’s it. Your WSUS is up and running. It does not use SSL and listens on port 8530. You can use the RSAT tools to manage the products, classifications and updates. The RSAT tools for Windows 7 can be downloaded here. Windows 10 as of version 1809 do not need an additional download. The RSAT tools have been moved to optional software features.
There are some optimizations, which are generally recommended for a WSUS installation. The first allows the IIS to use more memory (All available memory) and the second allows it to start more than one worker processes.
First change the private memory limit of the WSUS IIS application pool to 0:
Set-WebConfiguration -Filter "/system.applicationHost/applicationPools/add[@name='WsusPool']/recycling/periodicRestart/@privateMemory" -Value 0
And now change the maximum number of worker processes also to 0 (unlimited):
Set-WebConfiguration -Filter "/system.applicationHost/applicationPools/add[@name='WsusPool']/processModel/@maxProcesses" -Value 0
Post installation (Gui and core)
Now it is time to launch the WSUS console. You will find it in the folder Windows Administrative Tools in the start menu. On a core server, you have to install the console on another client and start it from there.
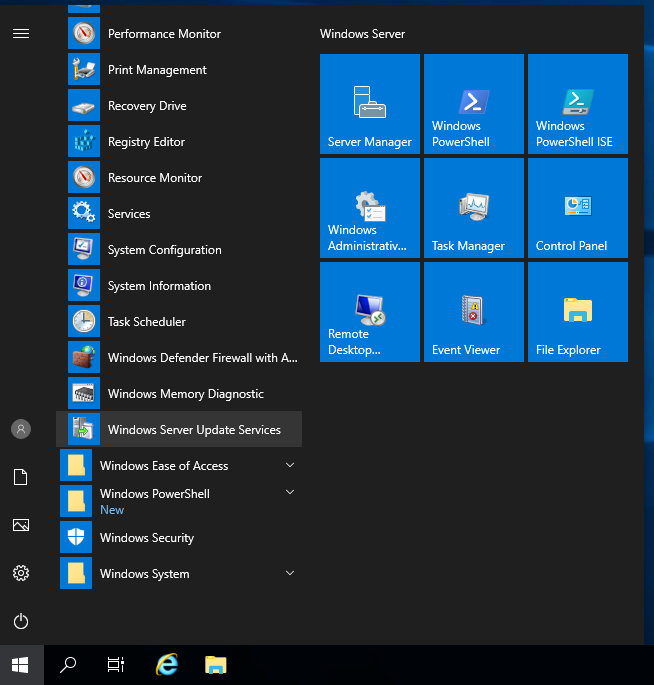
Launch the WSUS console
The first start of the console will launch the configuration wizard. Read the information and make sure, that you have prepared your environment accordingly.
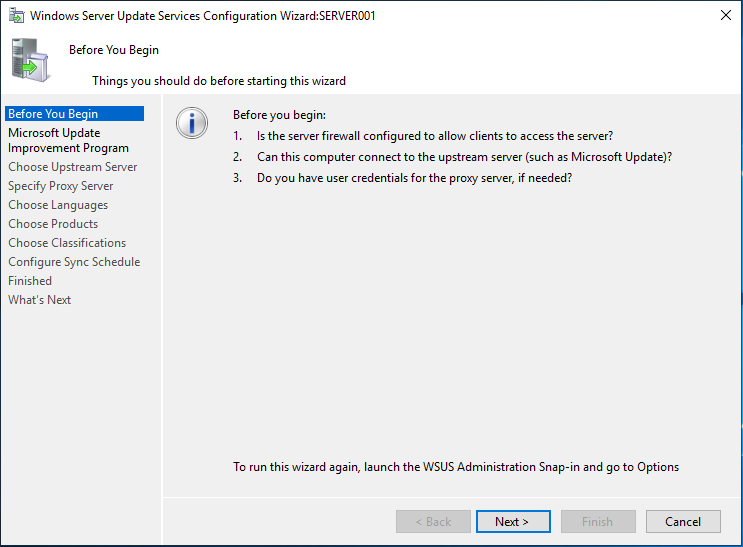
Welcome page
The next page asks you if you want to “join” the Microsoft Update Improvement Program. This will send Microsoft information about your WSUS server, updates and clients. If you join or don’t does not change the functionality of your WSUS server. Keep in mind that this might be a topic for your data protection team or your legal department (e.g. for the GDPR for EU companies). Click next.
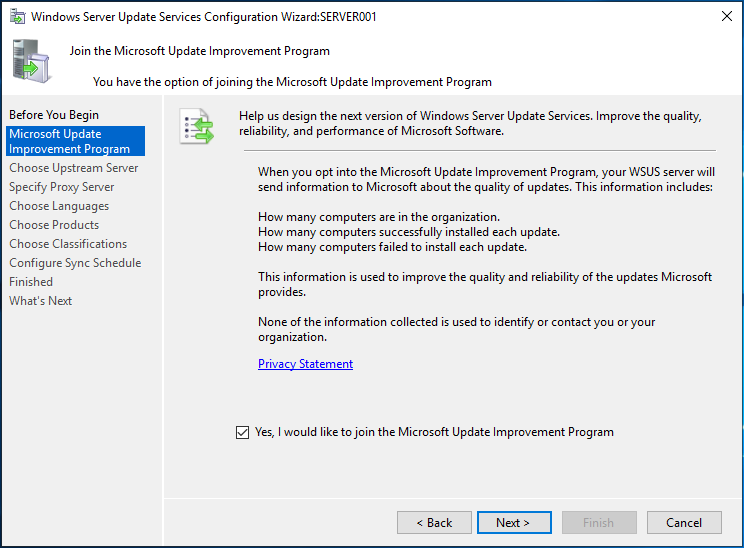
Join the improvement program?
Now it is time to select your upstream server. That server will be used to download updates from. In this tutorial we will install a standalone server and therefore will use Windows Update as source.
The other scenario would be for companies with remote locations. In this case you can centrally download an manage the updates but save bandwidth as you have to download updates from your headquarter just once.
Proceed with next.
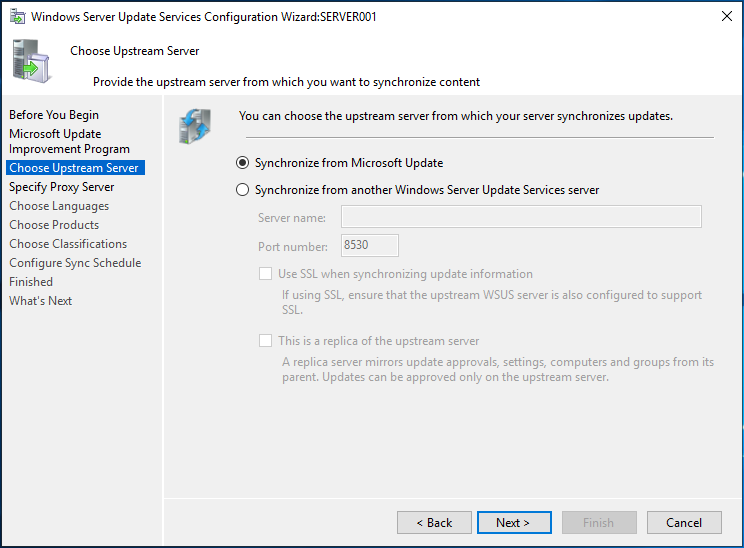
Select the upstream server
If your server needs a proxy server to access the internet, enter the information on the next page and then click next.
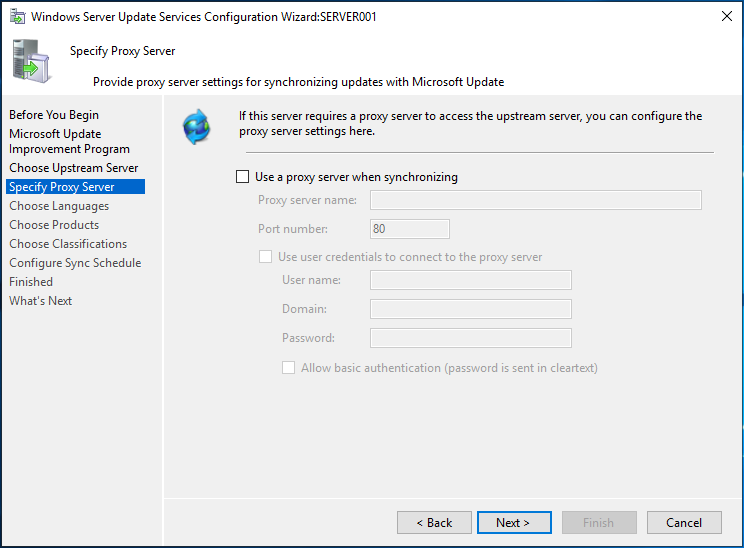
Define the proxy server
After all information have been gathered, WSUS will download a list of available products, classifications and languages.
Warning: This process can take a lot of time. 10-15 minutes are normal, but it might take longer. After the download has been completed, click next.

Download update information
Now you have to choose the update languages you want to download. I recommend that you choose the languages your clients are using. No more no less. You can change this setting at any time later. For this tutorial, I will select English and German.

Select languages
The next step requires you to select the products you want to provide updates for. For earlier versions it is mostly straightforward: Windows 7, Office 2013, etc. Just check the boxes. For more recent version it has become increasingly difficult: Office 365 is available as product, but WSUSU without SCCM cannot patch O365, Sharepoint and Exchange updates are working, but you have to manually download and install the quarterly cumulative updates. And Windows 10 worked with the product Windows 10 until version 1903. As of this version, you have to select the product for that version in order to receive updates.
You can select/deselect products later.
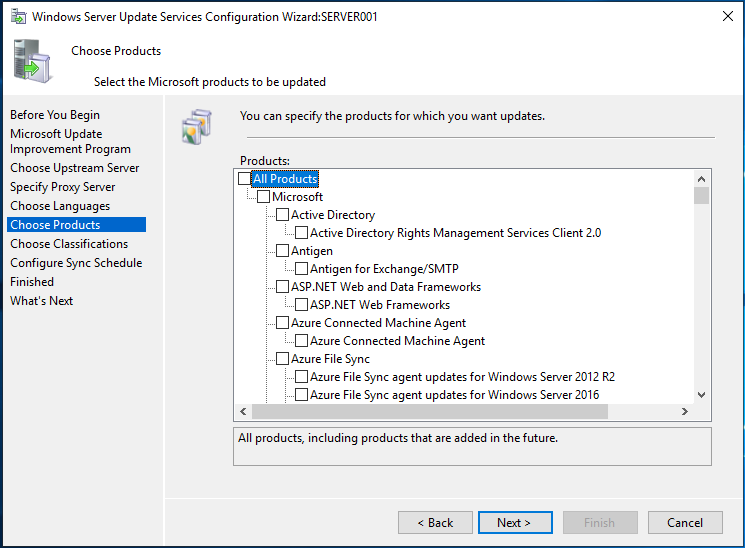
Select products
Afterwards you have to select the update classifications you want to download. This is the hardest step as beginners normally will not know which classifications they need. In general it is advised not to download and deploy drivers via WSUS.
My recommendation for a start is:
-Critical Updates
-Definition Updates (If you are using Windows Defender)
-Feature Packs
-Security Updates
-Service Packs
-Update Rollups
-Updates
-Upgrades
Click next to proceed.

Select classifications
The next page defines your sync schedule. This means how often your WSUS will search for new updates (plus changes to the products and classifications). I normally define to search once per day somewhere in the night when low traffic is to expected, but it is totally up to you. You can also define to just search manually for updates.
And again, this setting can be changed later.

Define sync schedule
The last step asks you if you want to start the initial synchronization. As this would download all updates (include superseded ones), uncheck it and click next.
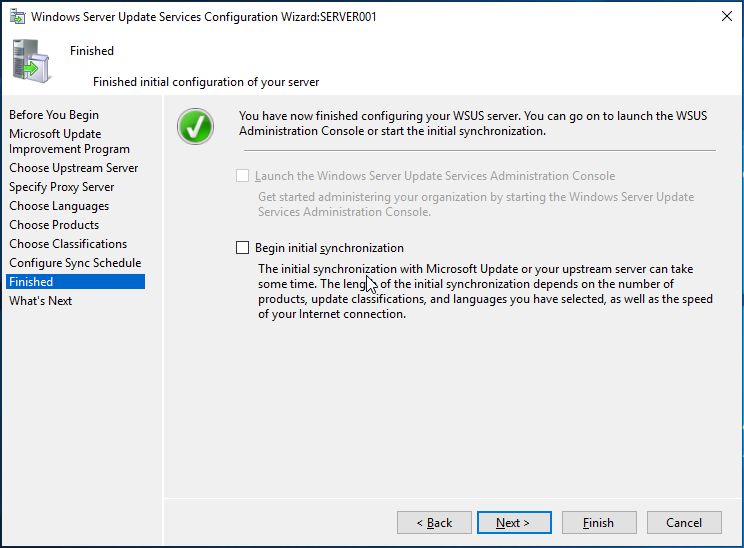
Final step
The What’s next page gives you some links to follow if you want more information about what to do now. Or you can click finish and continue reading this blog.
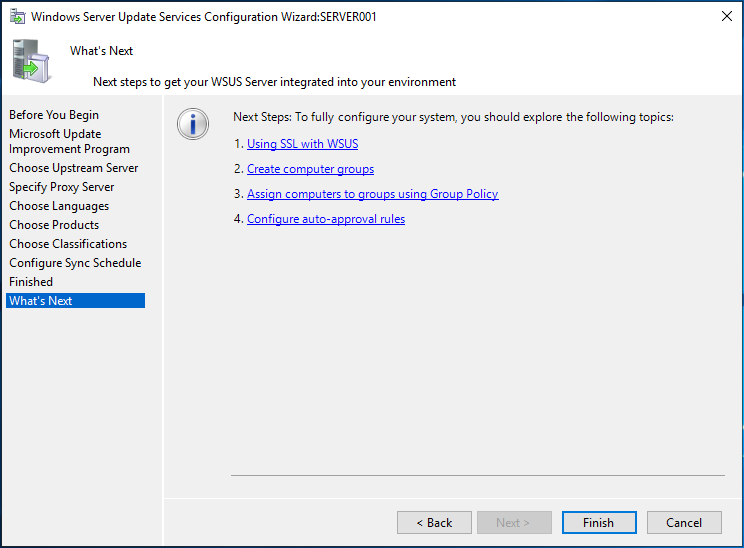
What’s next page
Now opens the WSUS console.
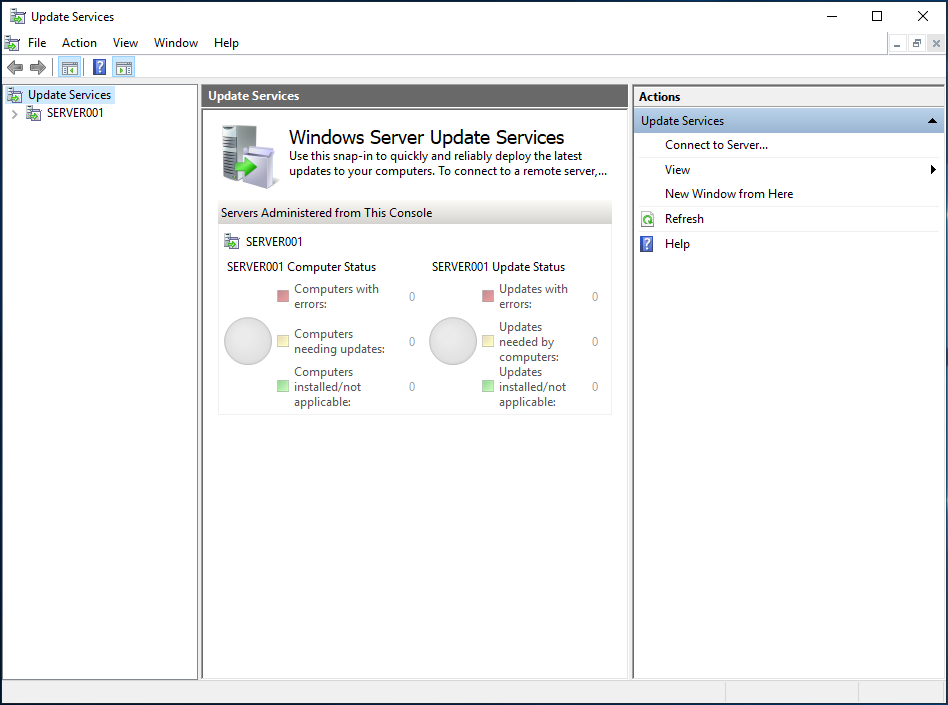
WSUS console
The first step is to check if you do not download updates directly as you would have to download hundreds of gigabyte for updates you may not need.
Expand the tree node with your server’s name and click on the entry Options. In the middle opens a panel with different topics. Click on Update Files and Languages. Check the option Download update files to this server only when updates are approved. This allows you to review all pending update files before downloading.
The option Download express installation files allows you to send smaller update files to your clients, but it requires larger disk space on your WSUS server. Use this option only if you have clients connecting to your WSUS regularly with low bandwidths like 3G, 4G or dial-up connections.
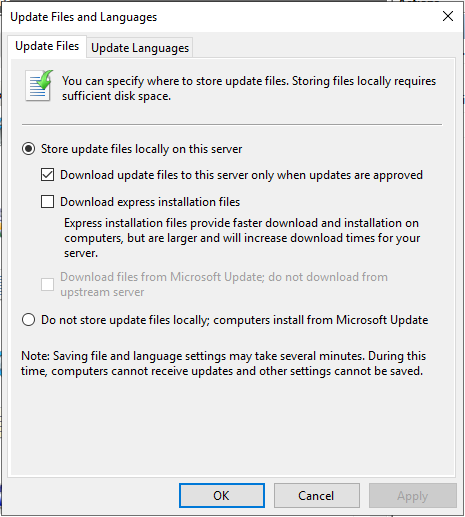
Download updates after approval
Now is a good time for the initial synchronization. Open the Synchronizations entry and click on Synchronize Now on the right side.
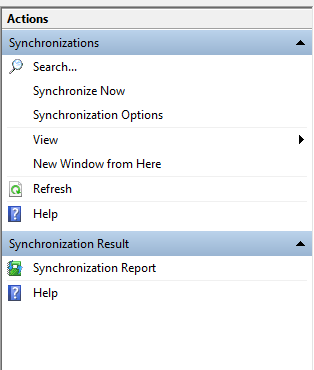
Synchronize now
You can monitor the progress by clicking on the entry with the status running and see the progress in the panel on the bottom.
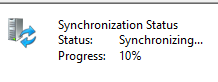
Monitor synchronization progress
After the synchronization has been completed, the installation is done.
Synchronization completed
You can follow the other steps in this post or continue with the client settings.